Tuesday, July 5, 2011

Ha Ling Peak - A Canmore Classic

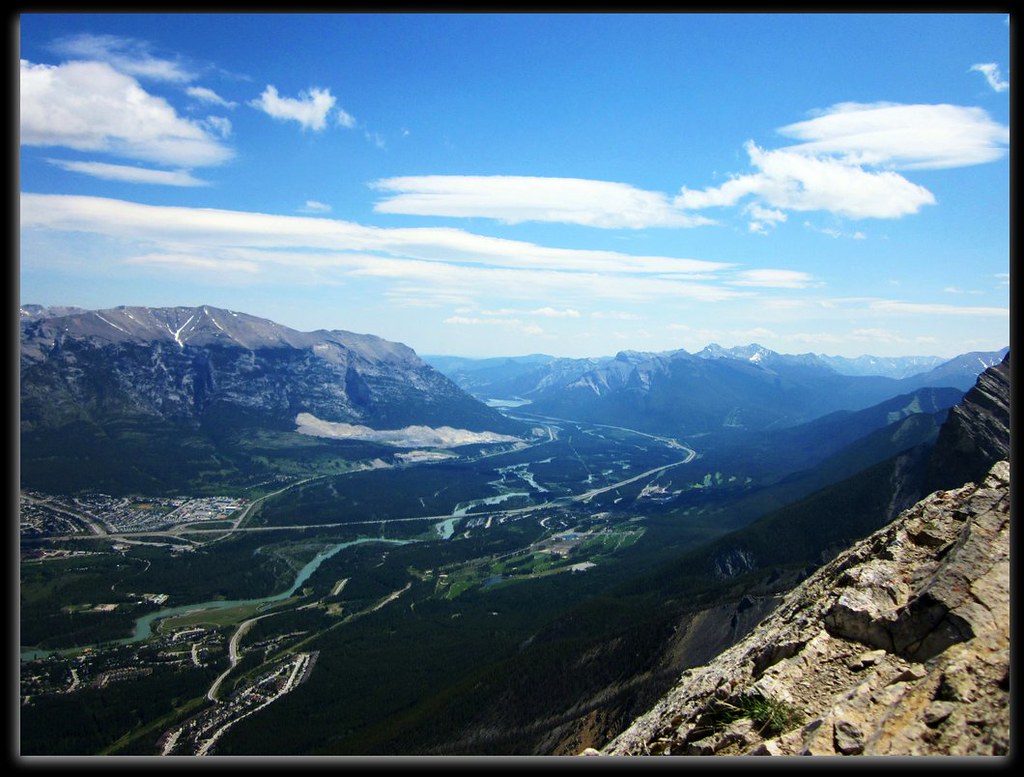
Standing behind Canmore like a sentinel, Ha Ling has become a classic Canmore Hike/Scramble.  On the scrambling scale, Ha Ling barely registers, on the hiking scale it ranks in as a difficult.  From the front the foreboading cliff of Ha Ling seems inpeneterable, but what reveals itself on the backside is a somewhat moderate slope.  It is this slope that attracts the people from Calgary and Canmore to Ha Ling. 

In late June, I decided that I would, along with some friends, hike up Ha Ling.  It would be my first hike/scramble since Prairie Mountain on March 5 (almost 4 months ago).  None of the group members besides myself had done this trip previously and I thought it would be a great way to get my mountain legs back.  So on July 2nd we decided we would have an outing and call it Scotch On The Rocks, named for the drink we would have while sitting on the summit.  The hike began modestly as it always does, climbing through trees along switchbacks on a well defined trail.  Stepping over some roots and around trees adds a bit of excitement to the otherwise monotonous forest hike.  After about half an hour, the trail will begin to provide the first glimpses of the Goat Range and Mt. Rundle before finally breaking the treeline in about an hour and a half.  Take time to have a breather at the viewpoints in the forest if you like (we did) but don't dwell too long, the views only get better - and Ha Ling is pretty much all about the views.
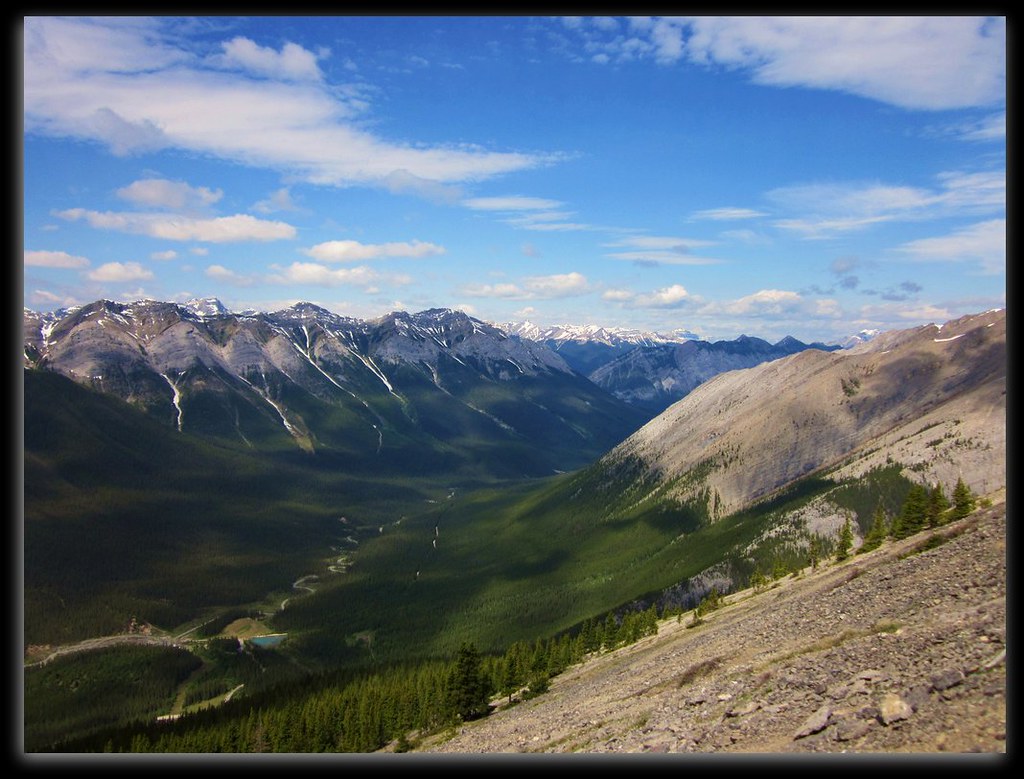
From just above the treeline the path splits into several, all leading to the summit on multiple angles.  You have the choice to beeline it stright tot he summit on some loose scree, or you can continue to use the well grooved switchbacks.  Once the summit is in view, the mountain holds no tricks, its just a matter of hiking the way up to the summit along one of several scree trails.  The col provides a good teaser to what the summit will provide.  We met a group there and I urged them to continue, suffice it to say, they were greatful that they took the advice and continued the extra 10-15 minutes to the true summit.

Our group decided to leave early to try and avoid the crowds for which Ha Ling is famously known for.  On the way up to the summit we shared the trail with about 3 other groups and found ourselves virtually alone on the summit while we rested and took in the awesome scenery of the Bow Valley.  On the descent however, the masses were marching up relentlessly one after the other.  Without exaggerating, I would not be surprised if we passed close to 100 hikers on our way down and close to a dozen dogs.  Children as young as 5 were making this hike - which goes to show the difficulty of it. 
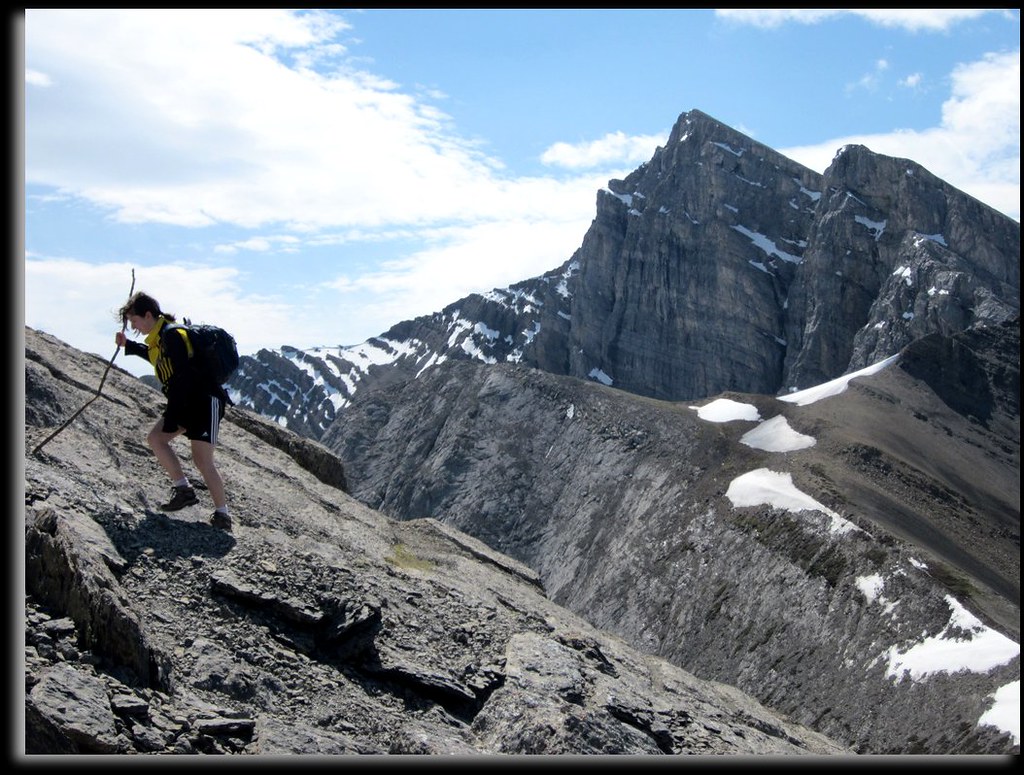
Unfortunately I do not have a great photo journal of this hike (there isn't exactly a lot to see until the summit) but don't be fooled, on a clear sunny and partially warm day, the summit offers some majestic vistas for the amount of effort put forth.  Our summit day provided us with partly cloudy skies and some decent winds blowing off the snowed-in mountains to the west.  This wind cause us to opt for a few heavier layers as we sat having lunch on the summit.
The total distance is about 6.5km and the total elevation gained is 729m and from car to car took us about 4.5 hours with a decent summit stop. 
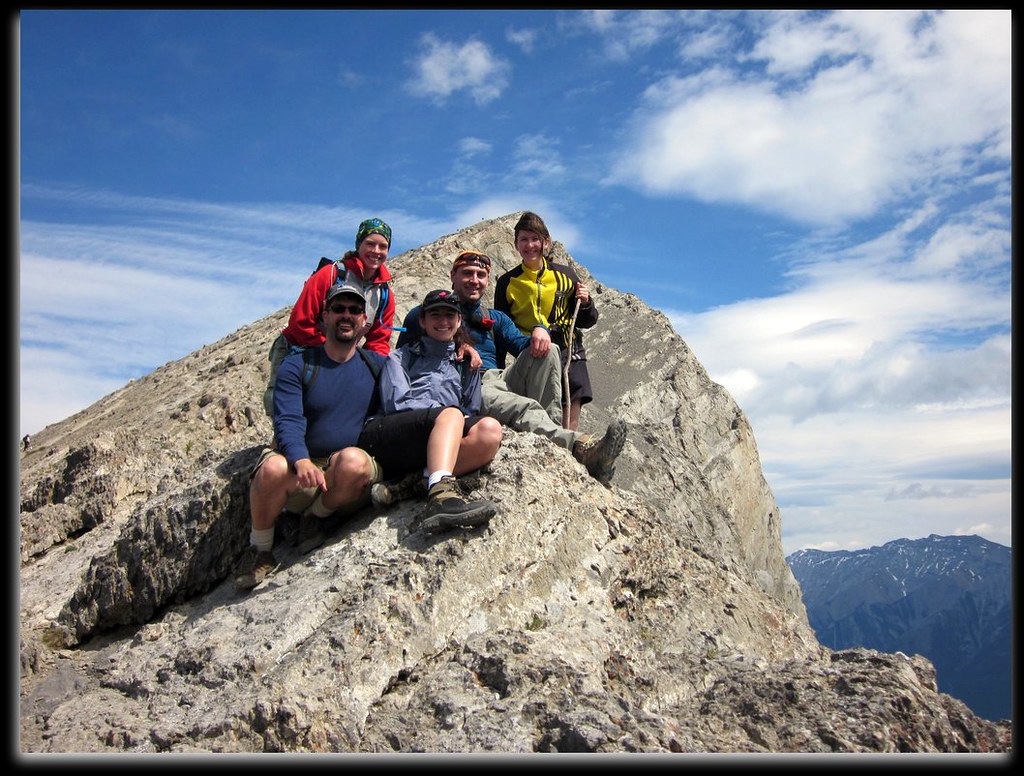
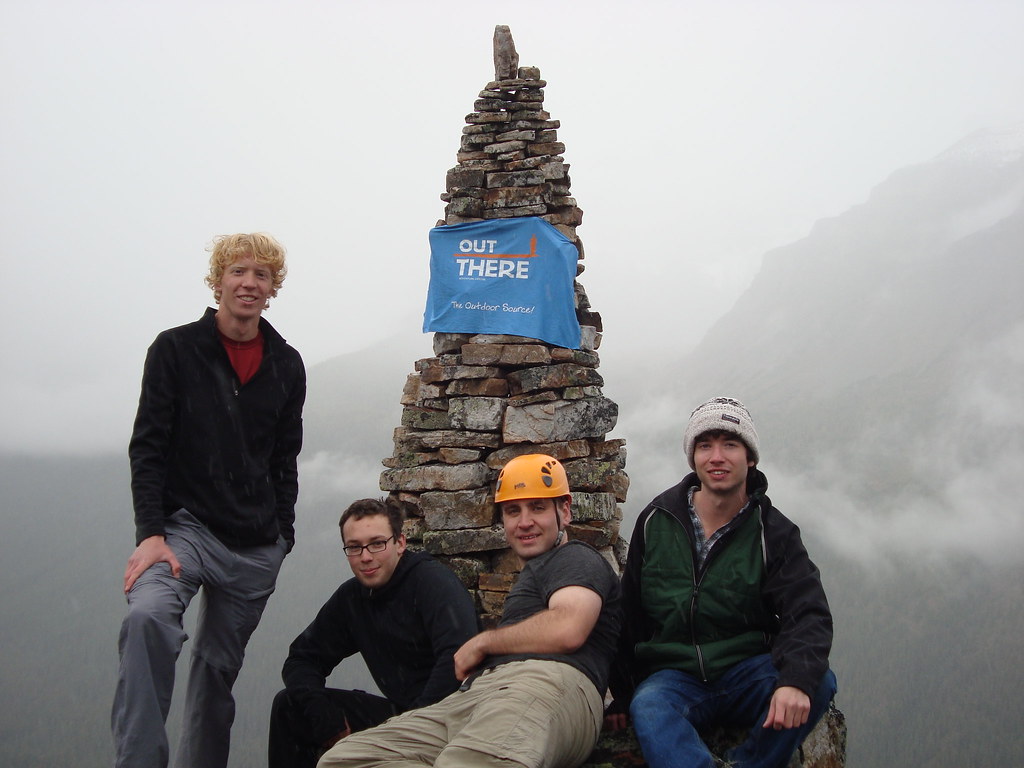
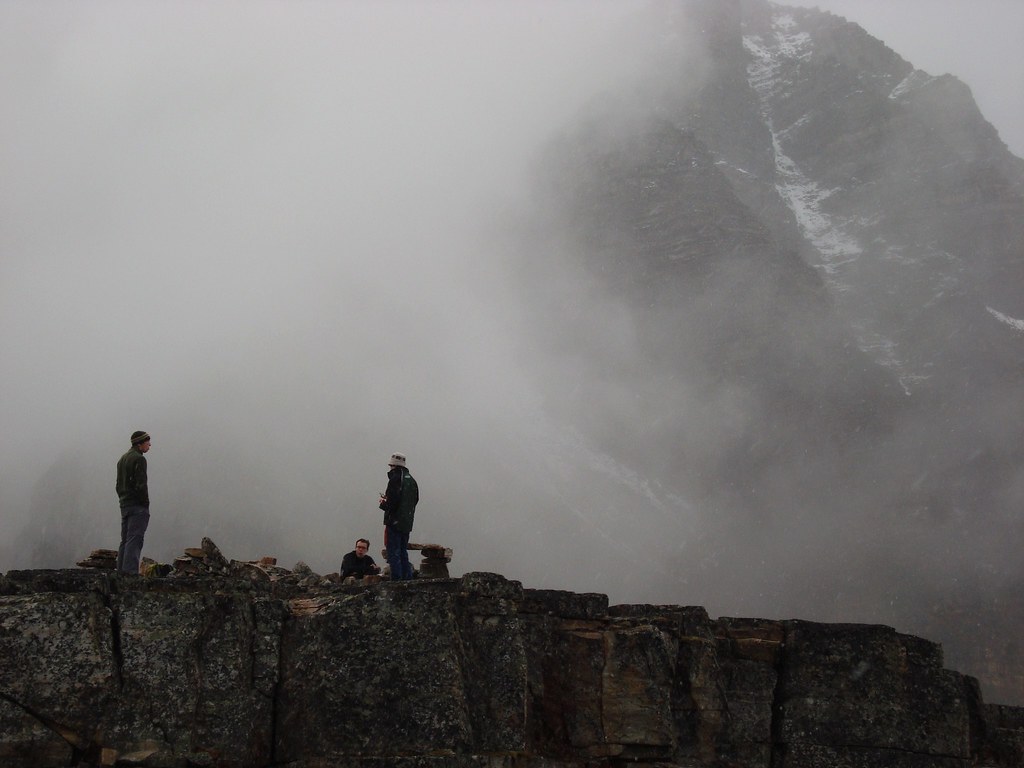
Group Picture From Col

View From Summit Towards Calgary

Sunday, March 6, 2011

Gear Review - Eddie Bauer First Ascent Summit Mitts

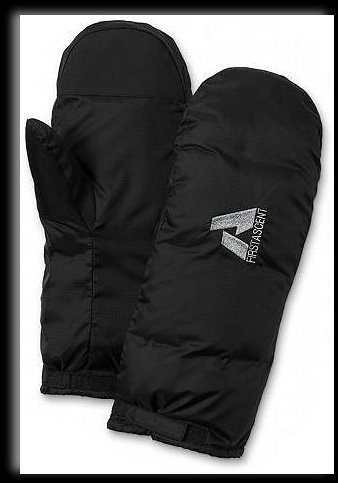
Eddie Bauer states that their First Ascent Summit Mitt is "a choice for high-altitude climbers venturing into inhospitable places, this mitt ensures that your digits stay toasty warm even in severe weather." I was about to put that to the test.

Living in Alberta, I have come to the foregone conclusion that cold is just a part of life - especially if I want to enjoy the mountains. You can either learn to enjoy it or hibernate for 6 months of the year. You see, Calgary sits at 51N meaning that come winter, the Polar Jet stream often sits to the south, bringing with it arctic air masses and freezing temperatures that can plummet into the -30s. In the mountains these freezing temperatures can be compounded by extreme winds and elevation that can drop temperatures down to the -50s, causing frostbite and hypothermia in minutes.

For several seasons I was grappling with keeping my digits warm during those winter excursions. I had tried many brands and types of hand protection. I had always been a person that preferred gloves to mitts. To me, the tradeoff of dexterity to warmth was enough to keep my fingers isolated. I managed well with polypropylene liners and thinsulate gloves for most of the time. The gloves allowed my fingers to move independently and grasp things and when they got cold, I would pull them into the palm of the glove, move them around and warm them back up. It was a minor inconvenience but one I was willing to pay. I have to admit though, in temperatures of warmer than -20C, the glove/liner combo did well. But what about the times when as you ascended the temperatures continued to fall?

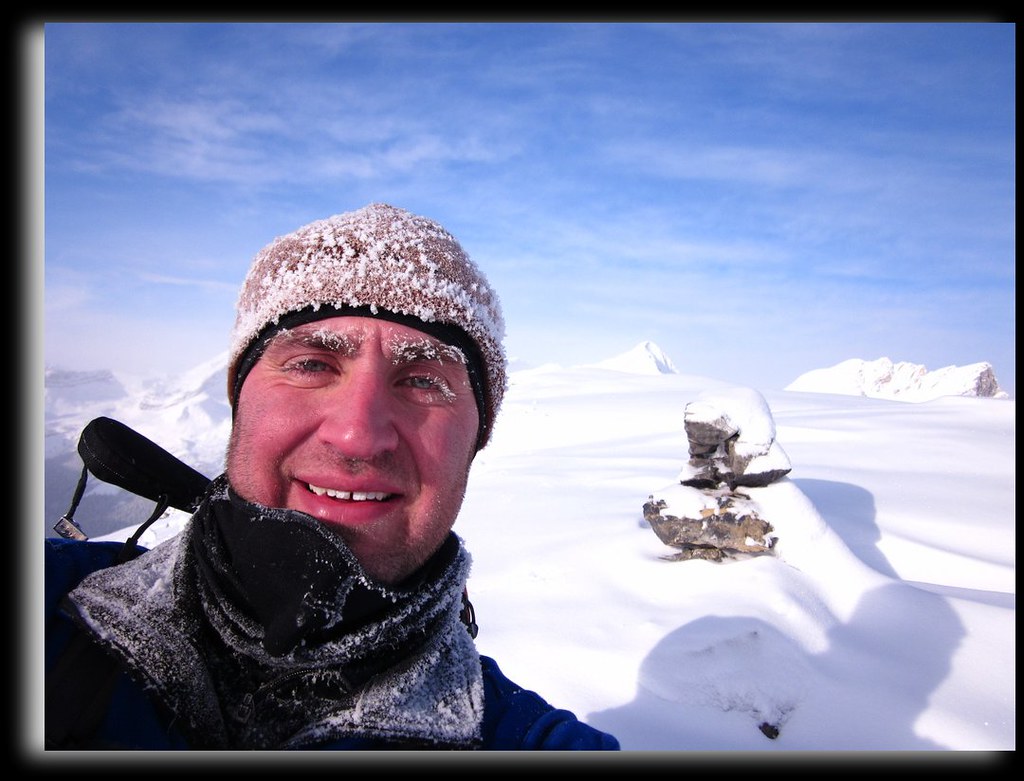
When temperatures dipped below -20C, I turned to a hiking favourite - oxygen activated carbon hand warmers. These don't add a lot of heat, and having them in the palm of your hand really can be very uncomfortable. So I went out and bought a pair of gloves that have a pocket for hand warmers that fit over the back of your hand. Was this to be my saving glove? I decided to put it to the test. In late November a group of friends and outdoor enthusiasts decided to hike to the summit of Paget Peak - as we pulled into the trailhead parking lot just outside Trail BC, the thermometer on my car read -36C and the summit was still 900m above where we were standing, and it was barren - meaning no trees to act as a windstop. As we gained elevation and broke free of the trees the temperature started its decline fairly quickly, finally coming to a rest at -43C on the summit. The sheer cold of the day was only offset buy the spectacular brillance of a clear windless summit, but the gloves with their liners and handwarmers were not doing the job. I found my hands clenched inside the palm of the gloves almost the entire trip. I had even somehow developed a technique of holding my ice axe with my hands clenched. Totally not safe but it gave my finger some warmth. What I took away from that trip (minus moderate frostbite on my nose) was that gloves just didn't cut the cold and that I was going to buy a pair of gloves, not just any gloves...a good warm pair of gloves, ones that did the job.

Thus my quest for a mitt had begun. Having worked in an Outdoor Camping & Hiking store previously, I knew what I had in mind and what companies had what out there. I had also read reviews from the net, talked to people about their experience with mitts and even tested out several makes and styles. I had my eye on the Black Diamond Mercury Mitt when I cam across the First Ascent Summit Mitts while shopping for some base layers at my local Eddie Bauer (they're base layers are also top notch). The first thing that stood out was the colour. One thing I have been moving more towards in my outdoor wardrobe is brighter colours, these can prove invaluable in times of distress. After the colour the next thing I looked at was the insulation - and this is where I fell in love. The Summit Mitt boasts a dual-layer primaloft shell with a removable 550-fill goose down liner, both lined with a wool-poly blend. Talk about the best of both worlds. Primaloft has one of the highest warmth-to-weight ratios of any current synthetic insulation, it also retains more of its thermal capabilities when wet - which is why I think Eddie Bauer/First Ascent hit a home run using it on the outside and having the down in the liner. The Summit Mitts also contain a durable leather palm for extra grip and abrasion resistance. So after waiting for the Eddie Bauer Anniversary sale, I purchased the mitts and promptly put them to the test. The mitts sell for $149 CAD.

It was the middle of the week when I received them from Eddie Bauer (free Fed-Ex Shipping) so I had to try them in an urban setting first. The temperature was -32C with windchill and wearing them while walking to work was great. My hands never felt the cold, nor did they sweat like some reviewers have experienced. This past weekend I decided to try them on an alpine hike, it was much more mild but the temperature still came in at a chilly -26C. Standing alone on the summit of Prairie Mountainwith the wind blowing - my hands were warm. The only drawback I found was these mitts are huge and cumbersome to work in. Thankfully Eddie Bauer added wrist straps so when you pull the liners out of the shell, you are stil wearing a 550-fill down glove and the shell cannot blow away. The fact that you can remove the inner lining and separate the gloves is an added benefit - and as the liner gloves are less bulky, but still wind-resistent, warm and they give you more dexterity to tinker with small things like zippers on backpack and nozzles on stoves. They even have leather added to the underside of them for added durability and grip. When its time to put the shell back on, the liner just slips easily inside and velcroes securely into place.

Eddie Bauer/First Ascent definately in my opinion hit a home run with the First Ascent Summit Mitts, though I guess though with names like Ed Viesturs, Dave Hahn and Peter Whittaker behind the brand it ought to be good.

SUMMARY

PROS
  • Built-in flexibility
  • Lightweight and warm
  • Packability (can be "squished" easily)
  • Windproof/waterproof
  • Wrist straps to keep shell/glove on body
  • Stylish colour
  • EB Lifetime Warranty
  • Free shipping when ordered online
CONS
  • Some may find it bulky when together (but considering what they are designed for, its accptable)
  • Cost (may be priced outside of some peoples comfort zone - but is great for what you get)
OVERALL RANKING: 5 / 5

Thursday, September 16, 2010

Adventures At Moraine Lake - Tower of Babel

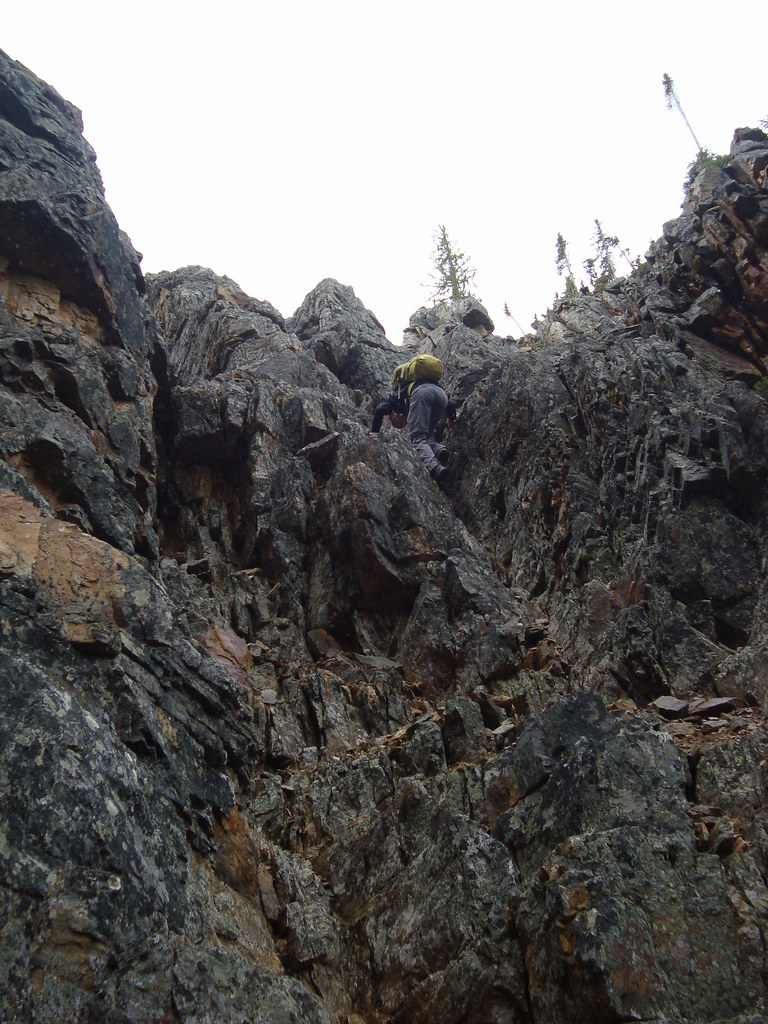
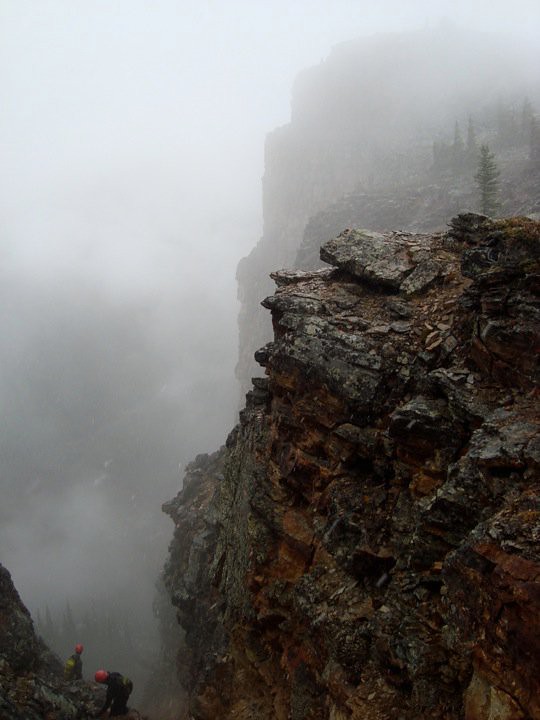
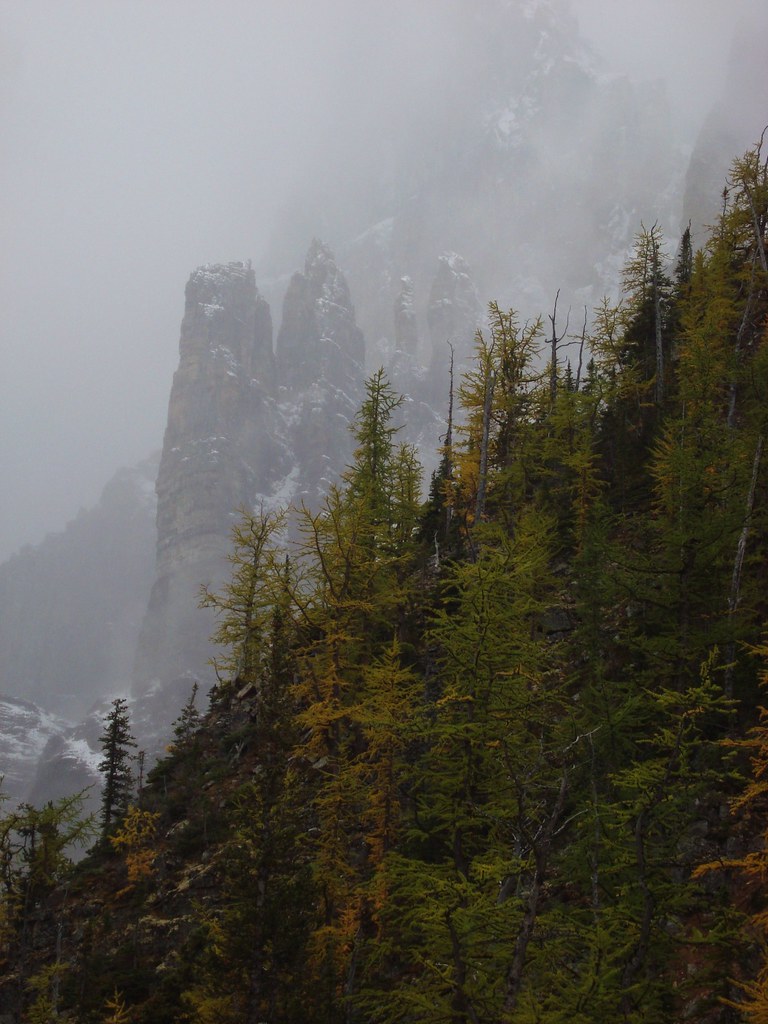
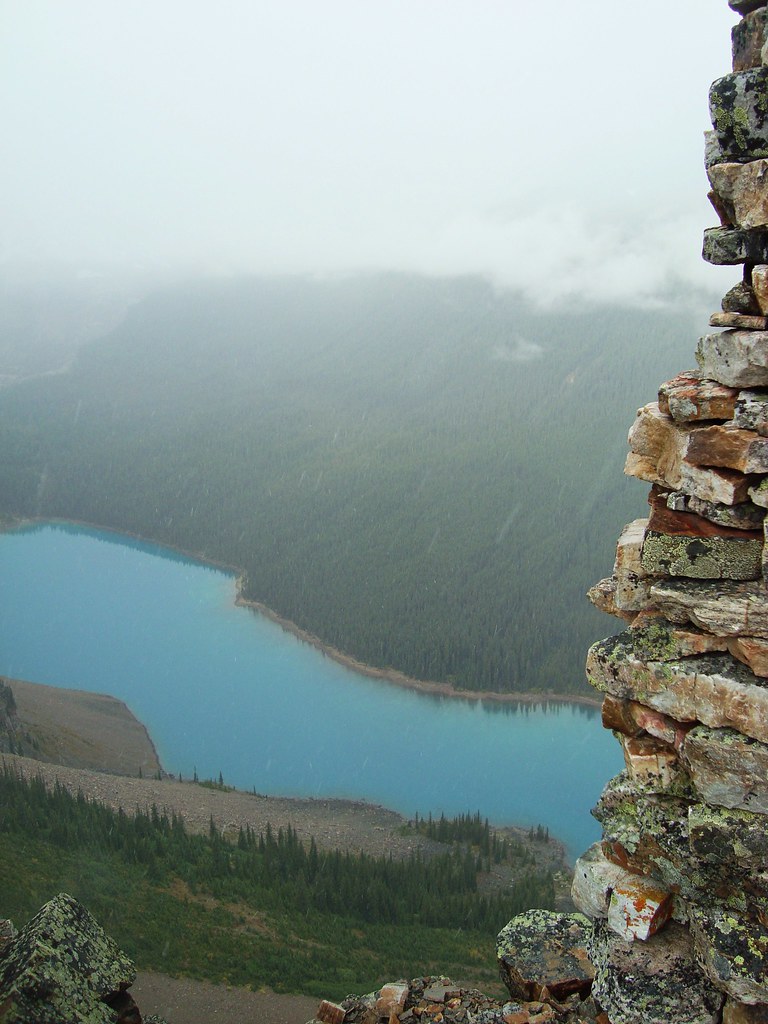
The past weekends mix of low temperatures, low-lying heavy fog and wet snow kept most people indoors and those that went outdoors mainly stayed low. It also provided the opportunity for some quiet scrambling with some friends without the hoardes of people and late year tourists as well as some spectacular photos. It also allowed me to bag my 7th peak of the year.

We left Calgary just after 5:00am en route to Lake Louise in Banff National Park. I've had my eye on a small 455m quartzite spire named The Tower of Babel for some time. I had to cancel my two previous attempts due to heavy rains in the area, but decided unless there was lots of snow on the ground, we would attempt a summit. When we arrived at the parking lot it was a balmy 3C with a low cloud cover. We geared up with all the mandatory scrambling gear necessary for a slippery scramble up a very enclosed gully.

The total round trip time for ascent and descent was a mere 4 hours and provided us an opportunity to relax at the summit and take in some of the views that the low clouds and fog were providing. The ascent was through a narrow gully, although there is some optional moderate scrambling on an outcrop that forms the right wall of the gully. We decided to venture up a few times, but found that when slippery the loose rock can be trecherous and rockfall abounds, so a helmet is not an option but a necessity.

For a small peak surrounded by giants, the Tower of Babel can offer supurb scenery, the light dusting of snow slightly higher up mixing with the fog and the changing of the larch trees was a fantastic bonus that none of us expected. Well worth the trip and we'll likely be heading back next year for a summit camp. Enjoy some of the pictures below of our trip.


Sunday, January 24, 2010

Midnight Peak - A Temperature Inversion

Midnight Peak
Kananaskis Alberta
January 24, 2010
 

This was my second time ascending Midnight Peak.  My last summit was in the midst of a severe winter storm and had absolutely no summit view.  Located approximately 15km down Hwy 40 and an hour from Calgary Alberta, Midnight Peak is located south of Mt. Baldy and the summit can be reached one of several ways.  During the winter the safest route to the summit takes you along Baldy Pass Trail, up the north ridge, across a boulder field and finally up a broad scree-slope adjacent to an avalanche gully, before popping up on the summit.  In the summer, this route is very straight-forward and offers very little in difficulties.  In the winter, the trail can be slippery and the north-slope can hold quite a lot of snow that makes progress quite tiresome and slow.This trip was a typical winter ascent.

I was leading a group of about 8 people from the University of Calgary Outdoor Adventurers and due to different levels of experience within the group, opted to take the Baldy Pass Trail winter route.  The trailhead is directly across the road from Baldy Trail Parking Lot parking lot and the Baldy Pass Trail takes you up the valley between Mt. Baldy and Midnight Peak.  The trail itself is very treed and doesn't provide any view whatsoever, at the same time it hides the actual elevation gain you make along the 5km trail.  Our group stopped at Baldy Pass for a quick bite to eat and a quick rest.  The temperature that day was quite nice and about -4C at the Pass which allowed for a nice rest.  It also provides views of the ascent route as well as nice views of South Baldy and minimal views of Moose Mountan and Prairie Mountain.
 

Midnight Peak mid-slope
After the Pass the trail banks left and continues up a treed slope.  As you ascent the trees thin out and the view of Mt. Baldy gets better.  On this day the clouds started to blow in pretty quickly dabbing out most the colour in the landscape.  Shortly after following the trail (and clearing in the winter when the trail is not visible) we came to the boulder field.  This short section prpves the most technical in the winter.  As with any boulder field there is a lot of airspace between the rocks, as such lots of chances for a person to get their leg stuck or injured.  Add to that a few feet of snow and this section became quite slow as we meticulously picked or way one-by-one.  One past the boulder field you enter a large open area, in the winter this usually holds a lot of snow, on this day the snow was piled mid-thigh.  After that open are you briefly enter the trees and before you know it, you will be staring an avalanche dead on.  Start heading straight up the slope, however, in the winter, ensure you check for avalanche conditions.  This day avalanche conditions were low-moderate, however, we all brought ice axes as a standard winter safety item.
 

Just below the summit of Midnight Peak
The ascent once out of the trees is fairly straight forward but tiring and the summit is forshortened.  We took turns breaking trail through the knee-deep snow as we switchbacked our way up the slope.  As you climb higher, the view to the north and east usually opens up and you can see Mary Barclay's Mountain, Yamnuska (in the distance), Old Goat Mountain, Loder Peak and Door Jam Mountain.  On this day though, the clouds were quite low caused by a temperature inversion and our views we're minimal except for Mt. Baldy due to tiobeing the closest mountain.  As we climbed higher the clouds became thicker,.   However, about 40 vertical meters from the summit we exited the clouds.  The exit was abrupt and the view became awesome.  The clouds provided a veil, the lower portions of the mountains were mainly blocked but the summits broke through providing a feeling of altitude greater than we attained. 


Summit Shot
The most dangerous feature that you come across on a winter ascent from this route is an ever-present cornice along the South Summit Ridge.  As such I was the first person to ascend so we could keep people from walking on it and potentially falling (a fall may not be fatal, but would definately lead to some serious injuries).  Being 150m taller than the next closest mountain, Midnight Peak offers a fantastic view and is not a very popular mountain.  Midnight Peak also provides the ability to traverse all the way to Tiara Peak along what is known as Boundary Ridge.

For the summit shot I changed into a Maple Leafs jersey and Christine changed into a Calgary Flames jersey since both team were playing each other that night.  
 
We descended the same way following our tracks. 
 
View from summit
Photo of me on summit
Shrouded in clouds on Midnight Peak Summit Ridge

Sunday, November 1, 2009

A Wall of Stone

Mt. Yamnuska
Exshaw, Alberta
November 1, 2009
51°07′25″N 115°07′00″W

 
Mt. Yamnuska from trail.
The nice thing about Mt. Yamnuska, is that the scramble route is generally widely regarded as a year round route.  For this reason it is often visited in the winter and in th shoulder season by people looking to take advantage of nice days.  It is this reason exactly that I opted to co-lead an introduction to scrambling session as part of the University of Calgary Outdoor Adventurers.  The cold start to October had many thinking it would be a cold winter, however by mind-October the temperatures had started warming up and by late October, temperatures were back into the high single digit positives.  The forecasted temperature for this day in Calgary was 8C and sunny, which ususally puts the summits of the front ranges around freezing.

This trip started like all others.  We left the University of Calgary at 7:30am and after about 50 minutes or so were parked in the Yamnuska parking lot.  As we geared up with our helmets, poles and microspikes, we confirmed that we were taking the east to west route and being an introductory outing debriefed all members on what to expect.  We explained that the east to west route, albeit slightly harder, is much more fun and is an actual scarmble as opposed to a scree hike and includes descending scree as opposed to ascending it.
 
Typical trail through trees
From the parking lot we headed to the trailhead about 50m down the road just past the boom gate.  This is a very broad trail that in warm weather can be quite busy as hikers, scramblers and climbers all share the first portion.  The warmer weather the few days prior had melted ont he lower trail making the hike through the trees up the ridge quite uneventful but nice as this traill can get very slippery in winter and shoulder season.  The trail rus mainly through trees, however, about half way up the ridge the path clears and provices a nice vista of the mountains to the south such as Barrier Lookout, Mt. Baldy, Midnight Peak and Mt. Lougheed to name a few.  It also provides a good view of the prairie to the east. This area is a good excuse for a short break on a nice flat rock.

First break on flat rock
From here, the trail continues gaining elevation and twists towards the base of the steep walls.  Once above the treeline we were staring the rock face straight on.  Here we had to stop and layer up as the wind was picking up.  As we all put one windbreaking layers and heavier warmer layers.  This is where the hiking trail ends, directly in front of us is a chimeny about 5m (15ft) in height.  This chimney is an easy scramble with good holds but the snow did make it a bit more slippery.  It is also a nice break from the forest hiking we had been doing for about the past hour.  Once we went up the chimney one at a time, we were all standing on the backside of the mountain, the view was now blocked to the south, but the view to the north had opened, we were also now finished with conventional hiking and in the realm of off-trail hiking and scrambling.


The chimney
In clear conditions (no snow), the backside of Yamnuska is covered with criss-crossing trails through the scree.  On this day there was only a fine dusting of snow and most the well worn trails were still visibile.  We chose the trail that headed up towards the ridgeline traversing the backside of the mountain.  This trail leads to a spectacular viewpoint at the crest overlooking a sheer cliff.  This is a very airy spot to stand and more than the fair share of scramblers have succumbed to vertigo and had to step back.  We stopped brefly for some photo ops, but seeing as the view is similar to the flat rock we passed through the trails, we didn't stay long.  After a short stop we continued towards the summit, the trail is mostly the same scree that traverses a few false summits before we got to the crux. 


The crux of Yamnuska is a narrow ledge that you have to walk along.  This ledge is approximately 20m long and about 2' wide, but there is a chain that is anchored to the wall in several locations that makes this crux easier for those that choose to use it.  On busy days or in large groups, this is where you bottleneck as people are usually slow going across this.  There were some members that were nervous about this, so we decided to pair our group, we put strong/experience scramblers with weaker/newer scramblers with the pair with the weakest scrambler going last to show it is secure.  This was the slowest section as a few times people had to be coached across.  Overall, this is actually a fairly easy section, but the 30m vertical below the ledge can really give some people cause for concern.


Once past the crux, there is a little more scrambling where we droped elevation to get back on the trail.  The snow was piled here and it made the rock a little slippery and slower than normal, however, since everyone had already done the crux just prior, confidence was running high and members.  After this there is a little more traversing and within a short period of time we were on the summit ridge.  The summit doesn't offer a spectacular view, however, it does provide a nice juxtaposition of the prairie running into the mountains and you get a good view of the mountains to the South.  Personally I prefer the view to the North as there is little evidence of civilization and the view is more natural.  The temperature on the summit was a little above freezing, this allowed for a little longer summit stay than most late shoulder season summits usually permit.


Summit shot
The descent trail trail finishes the traverse and is quick as it descends the scree you have been ascending.  As we came down we showed people how to "plunge step" and "scree ski".  This is a quick way to descend.  We had to stop "scree skiing" for the part of the trail that traverses under the huge looming cliffs.  This is sort of awe-inspiring and really puts perspective to how small we really are.  After about 10 minutes of traversing below the behemoth, the trail descends directly down the scree slope.  Using our GPS, both Moritz and I ran down as fast as we could, seeing who could reach the fastest speed.  My GPS clocked me a top speed of 26.8kph (this is more than 10% faster than Usain Bolts 9.58s 100m run in 2008 - granted he wasn't running downhill with the help of gravity).  This goes to show how fast you can descend, the only problem is you have to ensure that you can control your speed as it is quite easy to lose control, which could lead to serious injuries.  Running this speed down a scree slope is not recommended by me at all.


Rajiv descending scree
This is a good location to learn and try "scree skiing" as it is generally a really safe environment.  In fact, Yamnuska is often regarded as one of the best scree skiing descents in the front ranges of the Canadian Rockies.  I personally feel it ranks right behind Nigel Peak.  The trails through the screen are so big they are actually visible from kilometres away as you can be standing on Wasootch Ridge and see them relatively clearly.  These routes are also prominent linear features running directly down the screen and are easily seen from the highway. The scree trails quickly reenter the trees and begins and after about 25-30 minutes of hiking we were back at the trailhead where we delayered, changed out hiking boots to more comfortable footwear, debriefed, had a few snacks made dinner plans and headed back to Calgary.


Some other pictures from the trip:


Start of the crux
 
Summit view to the north
 
Summit view to the south looking towards Wasootch Peak, Mt. Bogart etc.